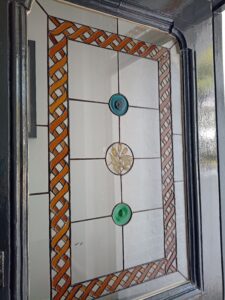
Stages of repairing the copper foiled door panel. Part 1.
I start by taking numerous photos, making note of the current state of the panel, where it’s weaknesses are and any broken pieces of glass. The weaknesses now help me to decide where the reinforcement will be needed:

The panel never leaves the board as the long side pieces would be particularly vulnerable to breaking:
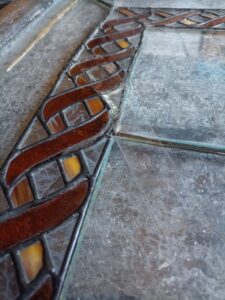
This also includes noting where the copper foil is lifting or has pulled away completely:

Breaks across copper foil and leaded light windows are a bit like lightning. A door or window will take years of small vibrations just through the opening and closing of it, the use of the locks and handles and even vehicles going past the property. Those vibrations are energy that needs to disperse. And like lightning, it likes to find the quickest way to do this. A straight line, finding weaknesses along the way, will do the trick and so a repeated vibration from near the handle & lock will travel through the panel from near that corner first, from one side to the other.

For many years, any panel can absorb and disperse this energy but over time, the materials used to construct the panel will age and start to become more brittle. The vibration continues as normal but the energy starts to spread further. In it’s determination to follow it’s straight line, it will automatically find the quickest, and increasingly, weakest path. Just as a lightning rod attracts lightning, a weak seam, a thin piece of glass or eventually, just any piece of glass that is in the way, will attract the vibration. Lead and copper foil can absorb a lot of vibration for a long time. Glass really doesn’t want to.
But sometimes, a broken piece of glass is just a broken piece of glass:

I start with anything that is already detached and I will work my way in to the middle. The loose border pieces come off first and I’ve cleaned the old putty and copper foil tape off too. And dirt or sticky residue from the tape is also cleaned off. Copper foil tape sticks to clean glass, or dirt, but we need the strength back so the dirt has to go:

The panel wants to come apart across it’s width so I go with it:

I tease away the inner borders, usually in sections and using the broken pieces to do so. The top and bottom brown pieces here are broken and will be replaced:

As the pieces pull apart, the copper foil tape always pulls away from one of the pieces of glass. The solder is always much stronger than the sticky-ness of the tape. The tape that has pulled away needs to be ‘unsoldered’ from it’s neighbouring piece. The silver at the bottom of this piece is the soldered edge of the inner border, the copper at the top is the inside of the tape that has come away:

The lower edge here has had the copper foil tape, from the neighbouring piece, removed. I carefully wiggle my soldering iron between the two pieces, melting the joining solder, and the two separate. When I’m removing a piece of glass, like this broken one, then I remove the bead of solder on the front and back, raise the edge of the tape off the glass and the broken piece will gently pull away:

The bead of solder is vital to a copper foil panel. It adds strength to the front and back by reducing the flexibility of every join. As the solder will always be solid, more is better. Without it, you’re relying on very thin copper tape to simply stay put.
I’m always assessing as I go and a really useful thing to do, along with the photos, is to do a rubbing. This is extremely helpful with all the individual pieces that come away as well as making a note of the broken pieces:

This little part of the border is now in a number of sections because of where it was pulling apart and the broken pieces that will be replaced:
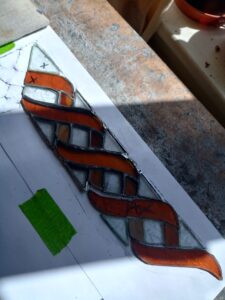
I’ve worked my way around and around and in to the middle:

And there’s nothing quite like making a mess of my workbench as I go:

Part 2
Broken pieces of glass are being replaced. Each piece is cut using the original as a template and then I use a glass grinder to remove the sharp edges and leave a rough edge surface:

Each piece is wrapped in an adhesive copper tape. The tape comes as copper backed, silver backed or black backed depending on the finish of the solder. As this panel has been finished in black, then the copper foil tape used is black backed:

Big pieces, small pieces, roundels and replaced pieces are all copper foiled:
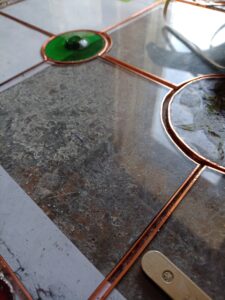
And everything is checked to make sure it all fits:

Each newly copper foiled piece is then tin soldered. This is a light coating of solder that covers all of the copper foil tape along the edge as well as the top and bottom. The advantage to this is that when soldering all the pieces together, the solder between the pieces also stick and add more strength to the panel:

Big and small pieces get tin soldered:

Reinforcement has also been included. It’s a thin stainless steel strip that tucks in neatly down the length of the panel and is then soldered over. As the weaknesses in the panel were horizontal, the reinforcement has been fitted vertically.
Once everything is tin soldered, the main soldering can begin. Every piece is soldered to it’s neighbouring piece and small gaps are filled. The gaps in this panel come from the curved pieces sitting next to straight edges:

To add more strength to the panel, every seam is then bead soldered. This creates a raised seam and will blend in with the rest of the panel:
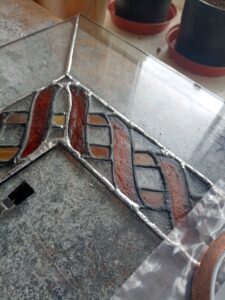
At this stage, it can look a bit messy and odd. Silver solder up against black. But it will all blend in at the end. One thing I have to do is to replicate the original work as close as possible rather than do the work as I would.
When everything has been soldered and bead soldered, the panel gets washed with warm soapy water and dried off. Flux is used during soldering but it can hinder the next stage, the black patina. The black patina is applied using a very technical piece of equipment – a toothbrush!
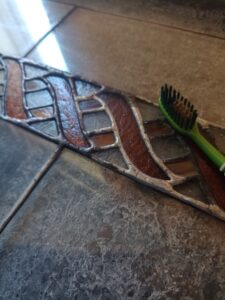
And very quickly the new solder starts to look like the original:

Keep going over all of the new solder, along every new seam and on both sides:

Once the patina is done, the panel gets washed and dried again:

And to finish, the whole panel gets a polish. Any residue patina or dirt or smear marks get removed and the shine is back on the glass:

And hopefully no one will ever know!

Part 3 – the panel is back home: